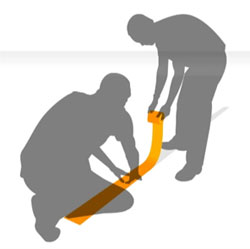
Installation Guide
Floor Tape How To Guide
 Clean and Dry Floor
As with any paint and tape installation, it is crucial that the floor be absolutely clean and dry prior to beginning the product installation.
Avoid Chlorine Based Cleaners
The chlorine in many floor cleaning liquids tends to leave a haze on the floor even after rinsing. Haze can make it difficult for any adhesive to stick effectively. Simple Green and Greased Lightning are examples of non-chlorine cleaners. If you are required to use a degreaser on the floor, remove/wash off the degreaser prior to applying the Heavy Duty Floor Tape.
Floor Tape Shrinkage
Corners that touch may shrink away and leave a gap after initial installation. Adding a small amount of Loctite Super Glue or equivalent under the tape at the corners can keep joints tight.
Eliminate Air Pockets Under Floor Tape
Driving something heavy, such as a forklift, over the entire line is a good method to ensure the Heavy Duty Product has been applied properly, and to remove any air pockets beneath the Floor Tape.
High Impact Zone Floor Tape Solutions
In areas such as high traffic zones, where pallets, skids or other objects have the tendency to scrape on the ground, we would recommend using the Heavy Duty Floor Dots or to score the Heavy Duty Floor Tape every foot to isolate any possible damage to a small area. Applying these Floor Dots to create a dotted line has proven to be an effective solution.
Avoid Sharp Tape Bends
Apply the Heavy Duty Floor Tape in a way that adheres to flat surfaces. Cut the Heavy Duty Floor Tape with either scissors or a utility-knife when you arrive at an elevated part of the floor, pillars, posts, table legs, and similar. Avoid elevated sharp bends that will capture air and dirt beneath it.
Repairs to Damaged Floor Tape
For a quick, professional looking repair, lay a new piece of tape over the damaged area, cut through both new and old tape at each end of the damaged area, peel out the old tape and apply the new for a perfect fit.
More Information on ifloortape.com Heavy Duty Floor Marking Tape
Custom colors and sizes are available. Call (855) 554-3566 for details.
Tips for Using Floor Marking Tape
The regulations require that permanent aisles and passageways must be marked. A common method for marking is by using yellow stripes. OSHA and the ANSI Z535.2 Safety Color Code designate yellow as the caution color, to be used for marking physical hazards such as stumbling, falling or tripping.
Miter Floor Tape Corners like a Pro
 Corners are easily and accurately mitered by overlapping two layers of floor tape at the corner, allowing several extra inches of product beyond the corner as shown. Leave the backing on the last foot of the bottom layer, and remove the backing from the first foot of the top layer. Affix the top layer to the bottom layer at the desired angle. Cut both layers together from the inside corner to the outside corner, discard excess pieces and press mitered corner to the floor. You may also use a sharp utility blade with a straight edge to cut the miter.
Floor Tape Aisle Outline Width
The recommended width of aisles is at least 3 feet wider than the largest equipment to be utilized, or a minimum of 4 feet. Storage room aisles containing flammable and combustible liquids should be at least 3 feet wide, and emergency exit access should have a minimum width of 28 inches. The width will vary depending upon how the aisle is utilized in the workplace, as aisles used for forklift trucks or other mechanical equipment will need to be wider than aisles for pedestrian traffic. A good average size is 4 feet.
What Size of Floor Marking to Use
The recommended width of aisle marking tape varies from 2 inches to 6 inches; therefore, any width 2 inches or more is acceptable. 4 inches is most popular as a highly visible, strong, cost effective option.
Color Standards
Questions? Need additional help?
Call (855) 554-3566. 8am – 5pm PST Monday – Friday.

 US Dollars
 Canadian Dollar
 Mexican Peso
 Brazilian Real
 Colombian Peso
 Chilean Peso
